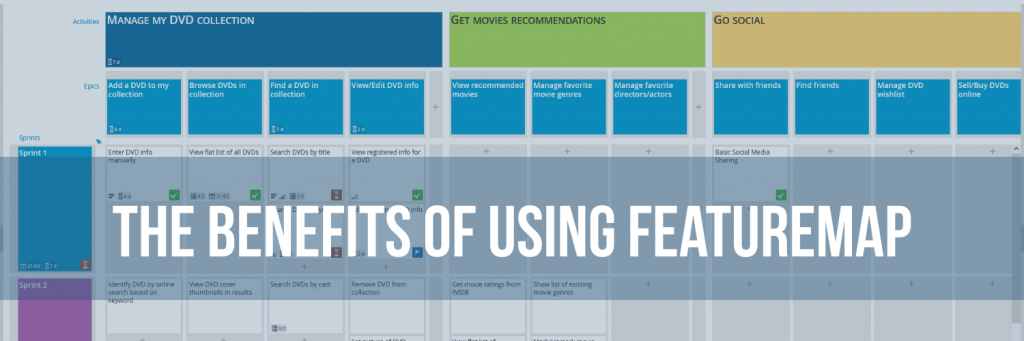
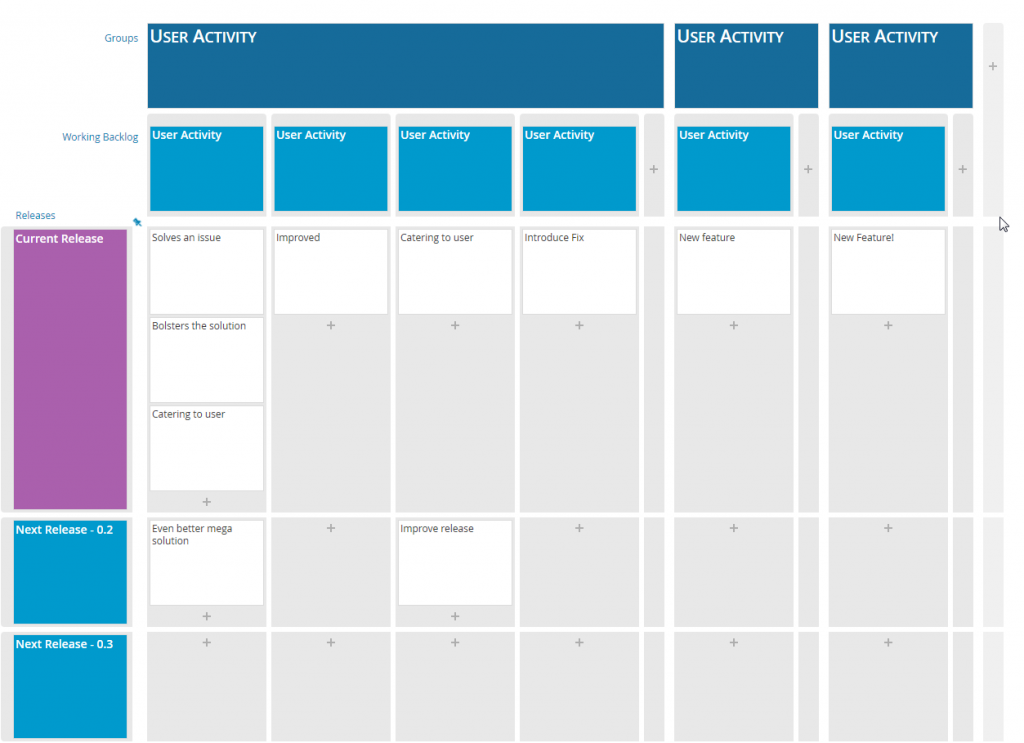
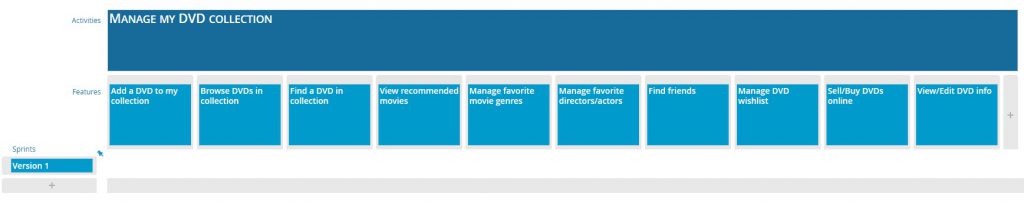
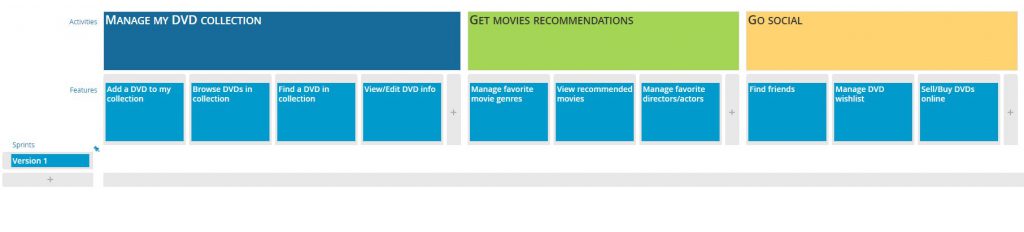
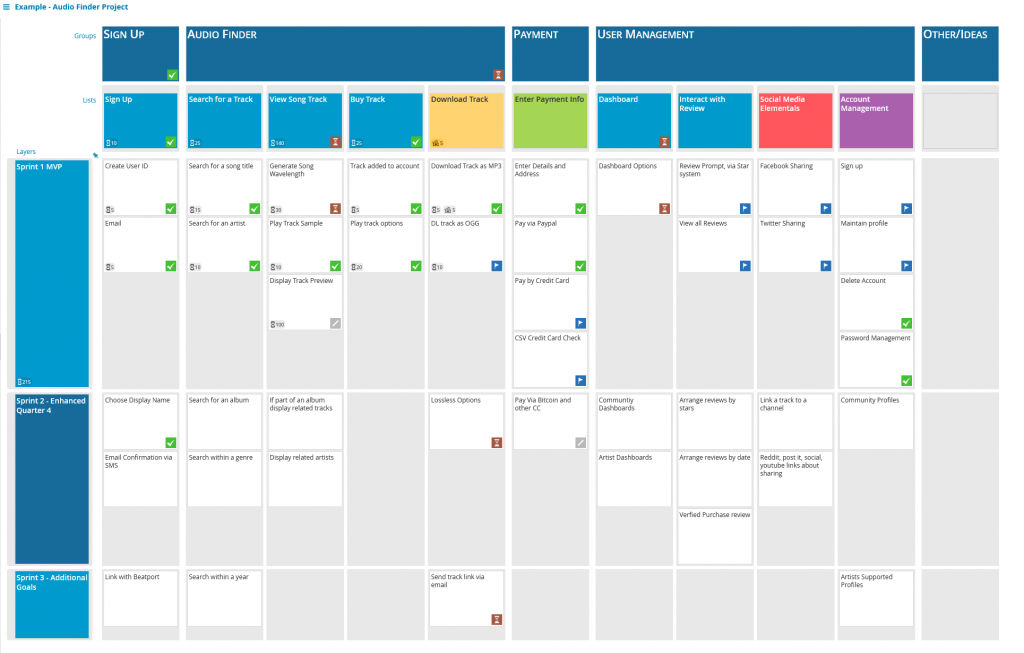
User story mapping has become a go-to technique in Scrum for effectively capturing and visualizing user requirements. While Product Managers and Agile teams commonly leverage this approach, user story mapping extends its benefits to various stakeholders involved in the Scrum process. This article will act as a comprehensive guide for Agile Product Development. Indeed, it will explore how the different users in Scrum can harness its power to drive successful product development.
Product Managers
As the orchestrators of product vision and strategy, product managers play a vital role in user story mapping. Not only do they utilize this technique to gain a holistic view of user needs, but also prioritize features. User story mapping helps product managers identify gaps, dependencies, and opportunities, enabling them to make informed decisions that align with the overall product vision.
Scrum Masters
Scrum Masters act as facilitators and coaches for the Scrum team. They play a crucial role in ensuring effective collaboration and communication. Hence, user story mapping serves as a valuable tool to guide and facilitate user story discussions and sprint planning. It helps them create a shared understanding among team members and fosters a collaborative environment.
Development Teams
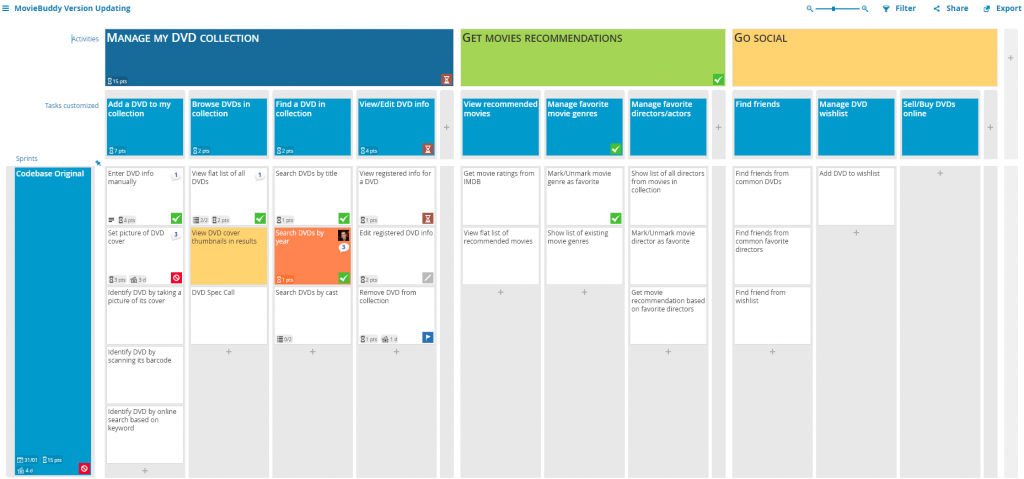
As for development teams, they are at the heart of the Scrum process, responsible for transforming user stories into working product increments. As a matter of fact, user story mapping helps development teams gain clarity on user requirements, dependencies, and priorities. It enables them to plan their work effectively, break down stories into actionable tasks, and align their efforts toward delivering value to end-users.
Designers
Next, user story mapping allows Designers to understand the user journey and design experiences that meet user needs. By visualizing user stories, designers can identify touchpoints, pain points, and opportunities to enhance the user experience. They can collaborate with product managers and development teams to create intuitive and user-centric designs.
Stakeholders
Finally, stakeholders such as executives, customers, and business analysts, benefit from user story mapping by gaining visibility into the product development process. The tool provides a clear picture of the product’s direction, timeline, and expected features. All stakeholders can actively participate in discussions, provide feedback, and ensure alignment with business objectives.
All in all, user story mapping is a versatile technique that caters to various users involved in Scrum. From product managers shaping the product vision to development teams delivering working increments, each stakeholder benefits from the shared understanding and collaborative environment fostered by user story mapping. By leveraging this technique, Scrum teams can streamline their processes, enhance communication, and deliver products that truly meet user needs.
Start embracing the power of user story mapping and unlock the full potential of Scrum!
You would like to implement user story mapping in your team but don’t know where to start? Check out our games to Teach & Learn user story mapping! Use our premade templates as a basis or read through our step-by-step guide to create your own from scratch!