In 2020 we saw the rise of Remote workers. In 2021 we saw businesses, that were ahead, embrace working from home and remote workers. With the shift, came the realisation that conversation is king when it comes to project management. Communication, communication, communication.
User Story Mapping is the tool for a team to build out, or embrace a project. It enables you and your wider team to come together and design your product in full.
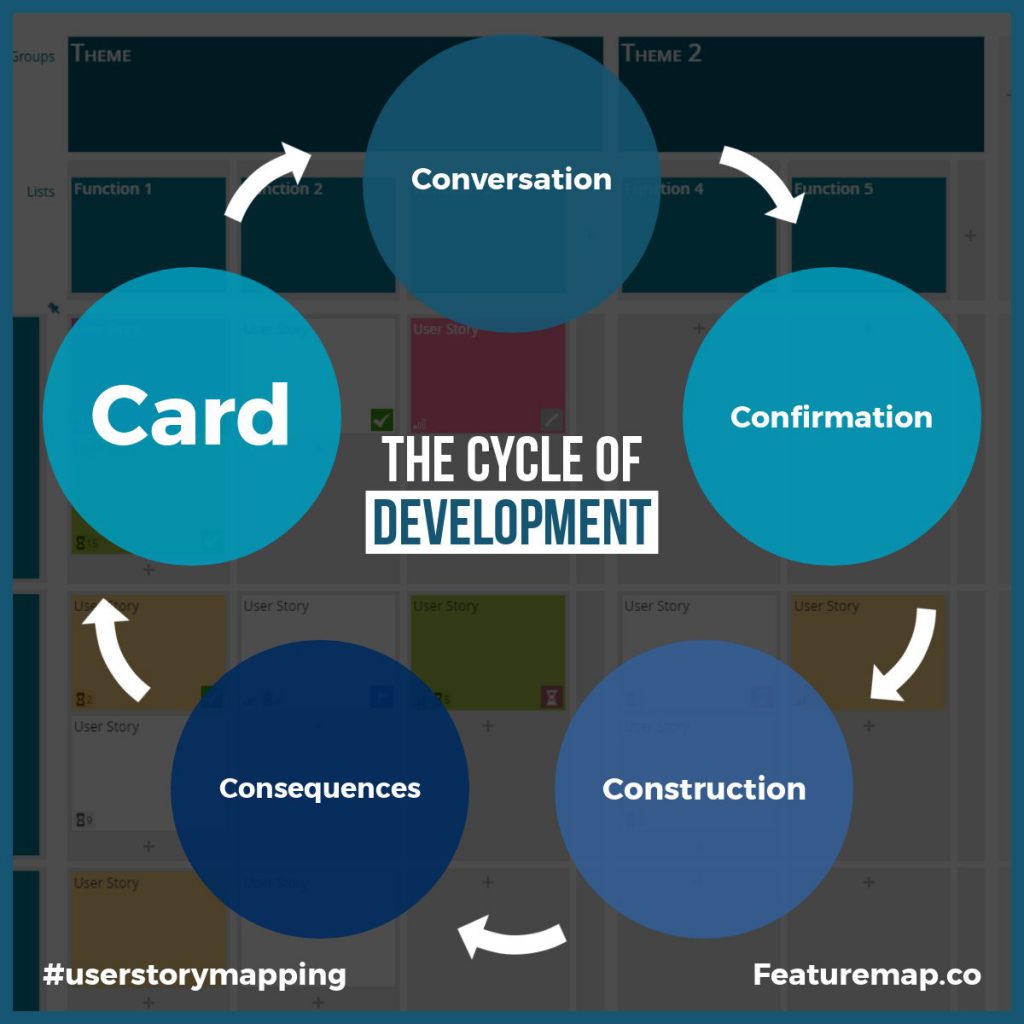
In essence, a simple story idea is; write something on a card, talk about it, converse and agree on what to build. -> Complete the build and move to the next.
It sounds simple, but in a working environment, it is normally vastly more complex. Stories end up going through multiple processes, cycles and conversations. Stories end being created with 3 main needs. A card for the business, a card for the user and a card for the developers. Luckily User Story Mapping is something that can absolutely lend itself to this process.
The Right Size for the Right Story
A tried and tested method to help develop your Map is utilising the “right size” method. Break down each part of the project/prodocut until it fits the “right size”.
For example, when writing a User Story Map with a team, you loosely fall into three categories:
The User.
The Business.
The Developer.
The user’s “right size” is a story or card that fulfills a need.
The businesses “right size” is a story which bundles features, outlines updates, themes or new products. First it is set-up as a Minimum Viable Product and following releases are the right size which helps a business achieve a business outcome.
The developer’s right size is the most efficient for designing, building and testing.
Really you can define these to your preferences, but if you are unsure, use the above outlines.
Big Stories Break Down to Smaller Stories
Big stories (or epics) can be broken down to smaller stories, and then again even smaller. Each sprint/epic/story/card can be defined for each group but no matter the size, they are still a story.
To break down larger stories, use conversation.
Conversation is one of the best tools for breaking down big stories.
Discuss and Discover
When you discuss with your team, break down each story until it fits the “right size”.
Each size will vary from business to business, and project to project, so don’t define too much. Use conversations to allow you to naturally identify the “right size”.
When you discuss, dig deep into:
Who the user will use your solution.
How the user meet their needs without your solution.
How it would change with your solution.
How your solution would look and function.
How long will your solution take to build.
Even after your discussed discovery session, don’t stop talking, don’t stop collaborating.
With each step, each conversation will have different teams and different conversations, in particular, the main three, so do note each evaluation will vary.
Yet with each conversation, each meeting, each get-together, this can lead to slow down, so be aware of how you plan your meetings.
With FeatureMap you are able to construct your maps and have constant, flowing conversation on each card, story or epic. Have your entire team chime in, discuss and do so remotely. Allow this process to be part of the working stage eliminating unnecessary meetings for all and saving time and money.
With each card, story and sprint you design and build, every single card will have consequences, re-explore these, discuss them, confirm them.
Conversation is King with User Story Mapping so get started, and save time and hours, Plug in your exisiting work, or start anew.
User story mapping is an agile methodology with a focus on product design/development. It doesn’t stop there, but in this article we’ll focus on product design. Designing with user story mapping is one of the secret weapons to create a user-centered product. The product design process always begins with first understanding the problem and the user’s goals. The power of this, is the ability to spec out multiple users, mulitple goals and clearly display our entire process whilst following a natural, narrative flow of the users journey.
User Story Mapping can be narrowed down to organising user goals, activities, and user stories. This can help your product flow or backlog and create an visual backlog, that everyone understands.
Why is it important to create a User Story Map for your project?
Your customers need a simple way to confirm product goals.
Your teammates benefit from such a straightforward platform.
Teammates can get access to the entire scope and see and add valuable ideas.
Developers can see the entire specification for the product.
To sum up, user story maps are the visual aid to building shared understanding between project members.
Creating a user story map can take time, but you can follow a pretty clear and logical process, with a good efficient start you’ll be ahead in no-time. This could be a solo task, but to the absolute advantage of a user story map is to use it as a tool to have discussions with your wider team team.
What you’ll need: Grab your team, your VOIP of choice, boot up a brand new Map (Create from scratch) and sit back with a meeting blocked out for the team.
Do note, this is not a presentation but an involved group activity, so be mindful of voip etiquette.
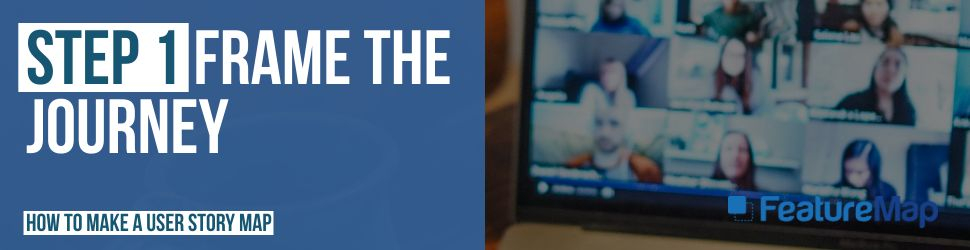
Step 1: Frame the journey
Before you start mapping, you want to frame the exercise around a common goal. This could be your product vision or the goal of a specific feature you’re mapping out.
One of the simplest ways to do this is just to ask: What does our product do?
If this feels too big or gets too unwieldy, think about some constraints you can add to your user story mapping session:
What? – What problem are you trying to solve? What product do you want to build or what feature do you want to add?
Who? – Is there a specific user or user group you’re building for? Who are your potential customers?
Why? – Why build this for the user? What is the benefit to your team and company for building this feature or product? How will giving users this add value to the bottom line?
Talk it through and make sure everyone understands the vision and overarching goal of the user story mapping session.
Be aware, you may find such varied views from each other this may outline some sticking points from the get go!
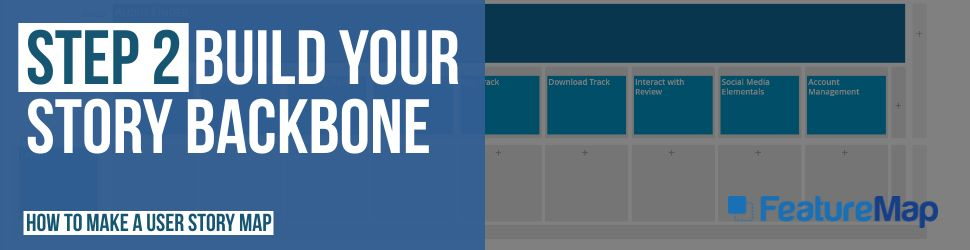
Step 2: Build your story backbone
The backone of your map covers the entire journey described in high-level tasks or steps from start to finish. Don’t get too detailed, that comes at a later task. Go wide, not tall. Discover your goals and map your journey.
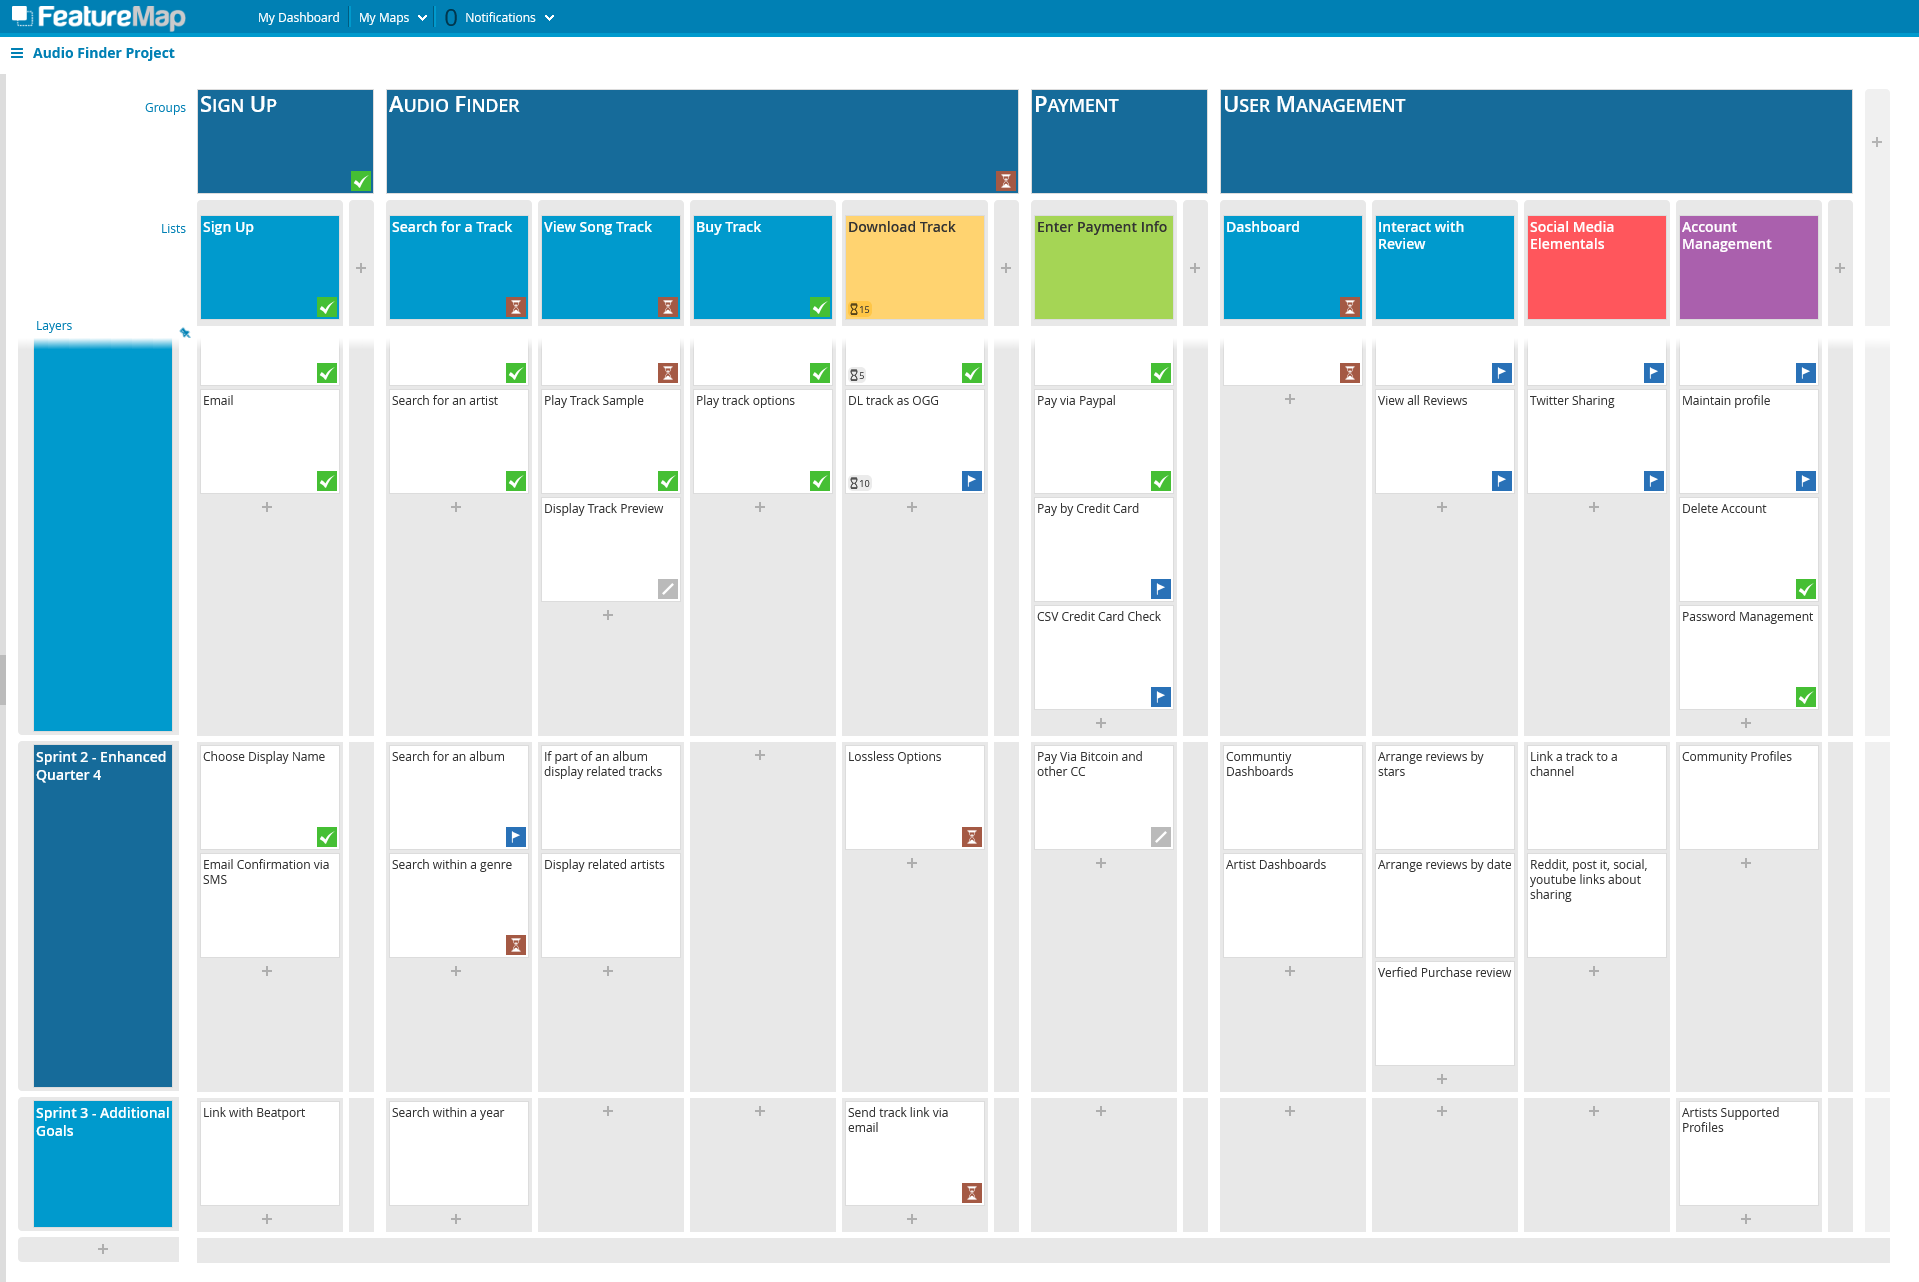
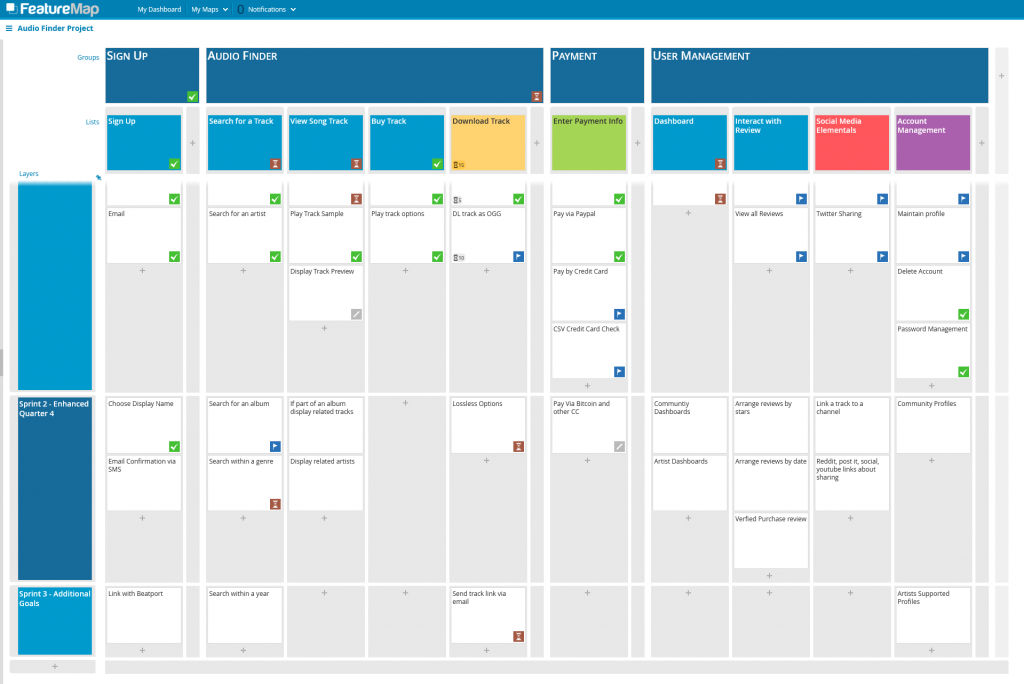
As an example, let’s say we’re building a product that helps someone buy a record track. At the highest level, the steps they take are:
Sign up for an account
Search for the track by genre/year/artists/album
View/listen to the song track
Enter payment information
Buy track
Download track
Interact with social/stars/review of track.
Each feature or step can get more indepth later and expand out with sub headings, cards and individual descriptions.
Your product is probably a lot more complex. Here are few ways to help identify your backbone:
The expert details the journey: Ask one of the subject matter experts to walk through the problem step-by-step. How do they tackle this? What steps do they take and what tasks do they perform?
Everyone creates cards and inputs on the map: As you create cards on FeatureMap, get each familiar team member writing their own cards and detailing their journeys. Everyone can input the steps that need to be taken and add them to the map. Don’t worry about duplicates now, as this may highlight misunderstandings or merge tasks to a better project flow.
Brainstorm with your team to collect the most possible solutions and put all user stories under the related steps.
Once complete, think about the ideal user flow. The use case. Does the map fit and cover all steps for the journey?
What if you’re working with an existing backlog? If you have a backlog full of well-written user stories you can simply add them into your map. In some cases, this might even be the majority of your steps and you could utilise an API, or import features from JIRA or Trello.
Step 3: Identify and group your cards
As you look through the steps your user takes, you’ll start to notice some common groups, or activities that could be placed within groupings. In user story mapping, we call these activities.
Your activities (also known as user stories at this stage) are listed above the user steps (or epics) to make up your backbone.
As an example, lets return to our previous product of buying a record track. Here we can build out a step:
Search for a track by genre/year/artists/album
We can break this into individual cards of:
Search for a track
Search for an artist
Search for an album
Search within a genre
Search for a genre
Search tracks within a year, or a specific year.
You can see how these could all be individual tasks with a group of “Search for a track”. Here we can, with relative ease, start to identify user steps, user stories that all correlate to a user goal.
User Goal/Activity – Find a Track. User Step/Epic – Search User Story/Card – Search for an artist, then search for a track.
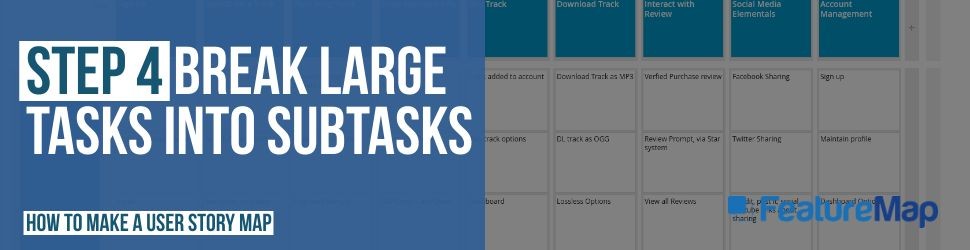
Step 4: Break large tasks into subtasks
It’s time to go a step deeper. The cards in your backbone are most likely too big to be tackled in a realistic single sprint. This step covers breaking down those cards and activities into smaller groupings and user stories.
Step 4 involves your team editing cards, splitting them into two, rewriting and reorganising them. Cards here could be reorganised and moved around the map. Placing cards into activities/sections/groupings will making it clearer for all involved promoting that shared understanding.
One key point of advice – Do Not Get Bogged Down!
FeatureMaps and User Story Maps are living, breathing things, cards get developed, edited, added to and when first mapping out the entire user story aim to cover it all at a higher level scope first.
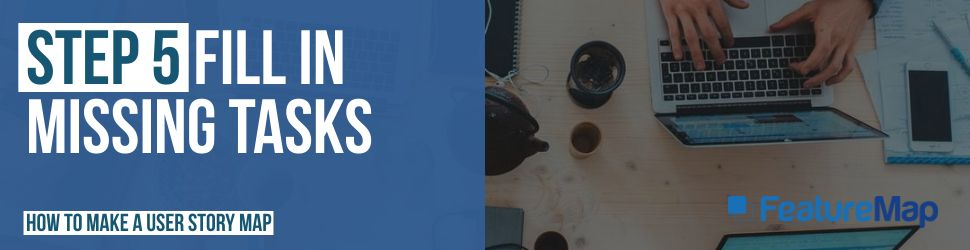
Step 5: Fill in missing tasks.
This step has you expanding, checking for missing task, filling in the blanks.
Ask your teams if they are covered and user story is represented no the map.
One simple and effective test is to have someone walk through the scenario from a different user perspective. This is what is called utilising Personas. Act out the steps as your user and allow the team to highlight when missing steps/cards/goals are not on the map and have them add them.
Each department will see this differently, for example the graphics and UX design team may differ on presentation while the coders are thinking about stacks and the sales team are thinking about pain points and upselling.
If a team member states “Ah ha, this is missing or may cause problems…” then this stage is doing well.
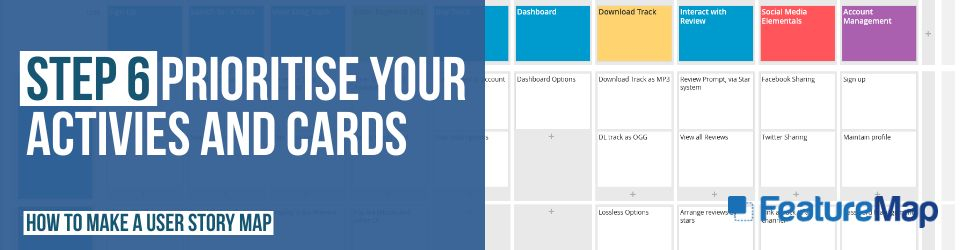
Step 6: Prioritise your activities and cards.
Your Map and backbone is how your users move through your product. Each section at this high level are equally important, building blocks to the entire product/project.
Here you can easily see the whole picture and work with your team to find the best minimal viable product. This stage is ideal to figure out what has the highest priority, while allowing other sections to be put aside.. for now.
Now that you have the user map prioritised vertically, you can create horizontal “layers” that represent your MVP to Full release.
A good practice is to ensure that each layer should be creating value across each user and activity.
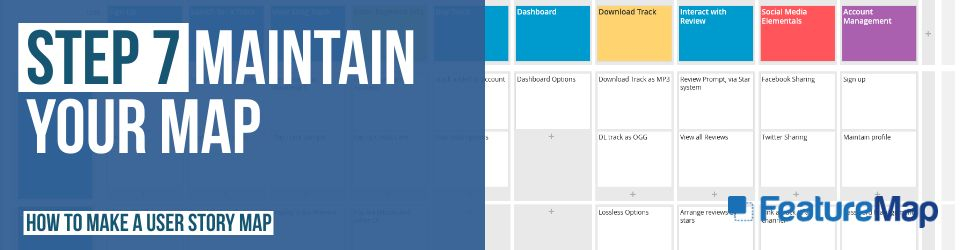
Step 7: Maintain your Map.
The last step covers using your living, breathing, evolving map.
Checking up your progress, see quickly the wider picture of your team.
Ensuring cards and tasks stay on track, assign deadlines to individual tasks and adjust work flow carefully.
In FeatureMap you can assign dates to tasks, cards or groups to keep track of progress.
You can assign cards to individual team members, and add progress status to each card, such as “todo, progress, done, etc”
You can expand and add timings or costings, or other custom metrics and utilise the aggregation tool which allows you to see the combined time within each sprint, grouping, or the larger map.
Audio Finder – A Fictitious Project about finding audio tracks and downloading them. Viewed as a User Story Mapping Board on FeatureMap.co