
Story Mapping consists of ordering a project or product into tasks and organising each one into segments so you can better understand the whole picture and make better informed decisions for timelines, resources and roadmaps.
Such tools as Trello can be great for tasks or quick lists, but when you need more than a just columns. User Story Mapping utilises an agile methodolgy, incorporates sprints and gives you a broader view across the entire project.
When it comes to backlogs it can feel overwhelming, in some cases difficult to grasp how to start or what to prioritise. At times projects can be entirely sidetracked by mismanagement of priorities and a good Story Map of a product can highlight the Minimum Viable Project.
To solve these situations a Story Map can be utilised to reduce the backlog, refocus the project and remind the entire team of the end goal.
When designing a Story Map you must look at the bigger picture. It is often sensible to set aside a period of time (hours or days) to effectively cover the vision. We have some further in depth guides and resources to read up which are linked again at the bottom of this article. But for now.. we’ll cover the basics as an intro to why Story Mapping is a reliable Agile Tool.
We have guides all across this blog, but to get you straight into it, lets do a quick theory crafting test.
You will need to set out the broad goals of the entire product… the ideals, the dreams, think big.
To best utilise Story Mapping is to tackle the entire big picture, not just a singular sprint. Do not fall into the trap of a niche narrow sprint at this stage. The power of User Story Mapping is being able to see the entire product and split it up into those sprints. To see what can the MVP, what can be the optimal, and even split the big picture into easy acessible projects.
First write out the user stories by setting out functions.
The fuctions could be “Logging in” or “Website Dev” or “Graphics Design”.
The limit is based on how you wish to organise. We suggest basic, and start simple as the beauty of working on a tool with many is the ability to adjust and change at will.
Good rules to follow:
Horizontally, set out the title and set the user story under each function.
Vertically, set out the main stories or issues related to each other.
At this stage you can then prioritise importance from left to right, and from up to down. This creates a format of the top left card, being the most important.
Once you have the information down in cads and across the board. Start to slice.
Slicing the list.
Once the stories are organised into groups and themes. You can start with slicing the list into sprints of what is the Minimum Viable Spec, or as Jeff Patton puts it — “The minimium viable product in the smallest product releases that successfully achieves its desired outcomes”.
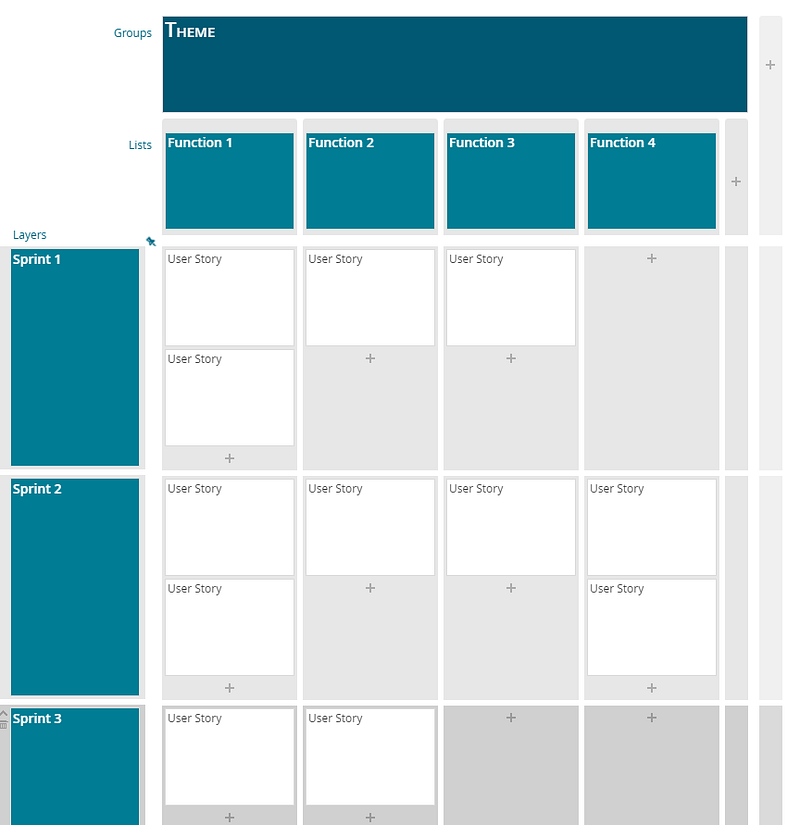
You can set sprints into what you need to achieve. The trick of utilising story mapping is by setting out the entire dream product, then breaking your product/project into sections of achievable, working, and required sprints.
Wait… are we done already?
Do remember, the story map is not a static beast, it can be adjusted, amended with feedback, changed and adapted to suit the needs.
With multiple team members working on it, as a team, you can start to see the end goal, the ideal product. When working as a group you will be able to clearly define what each of you need.
Too often I have seen teams all have an idea in their head, start with a map and quickly realise their shared vision was mismatched!
The simple act of making the map together re-aligned with everyone on the same page, generated new innovations and removed any potential future unnecessary friction.
Next Steps.
Some more tips for the next steps:
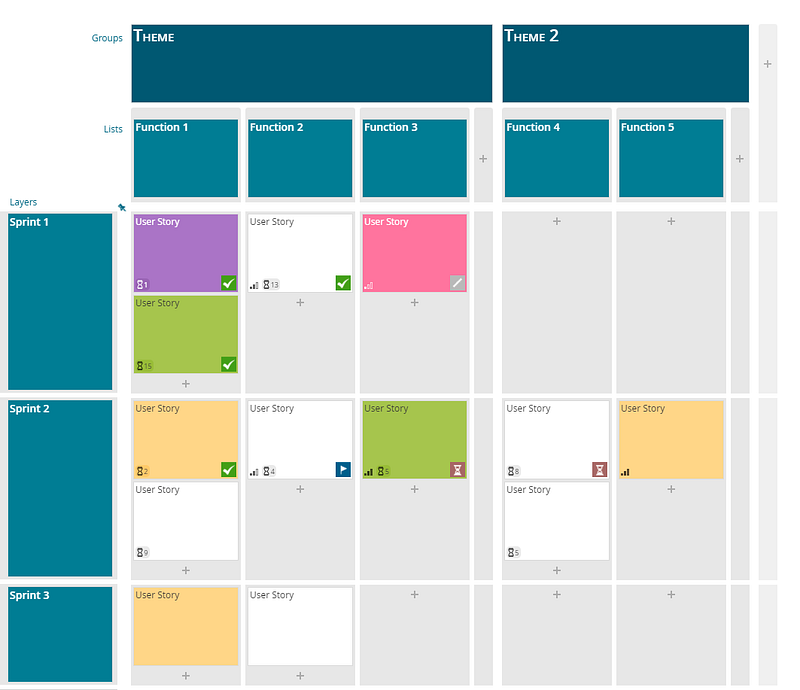
- Set status of a card
- You can set time estimations
- Set importance of cards
- Use colours to set a custom identifier, such as challenge or complexity.
- Use extra columns and set sections
The use of a story map will grow with each iteration, and with each demand.
One thing is to ensure you are always planning the entire project, clearing backlog and not focusing on individual sprints.
And all of a sudden you have a grasp of your project.
It really is that simple.
If you want to see the tool we used for the images, check out FeatureMap.co