Managing a project can be approached in a multitude of ways, and in 2021, with remote working and offices on the rise. User Story Mapping has rapidly stood out amongst the many agile methods. In one sentence, it can be easily explained as ordering a project (or product) into tasks and organising by priority and sophistication.
Let’s start with a brand new project, or we can take an existing project backlog. When it comes to backlogs it can be overwhelming, at times difficult to grasp, or what you should prioritise. At times projects are entirely sidetracked by mismanagement of priorities but user story mapping can resolve this.
Story Mapping can be utilised to reduce the backlog, refocus the project and remind the entire team of the end goal.
When designing a Story Map you must look at the bigger picture. It is often sensible to set aside a period of time (hours or days) to effectively cover exploring your vision.
You will need to set out the goals of the entire product, the ideals, the dreams, think big. To best utilise Story Mapping is the big picture, not just a sprint. Do not fall into the trap of a niche narrow sprint at this stage.
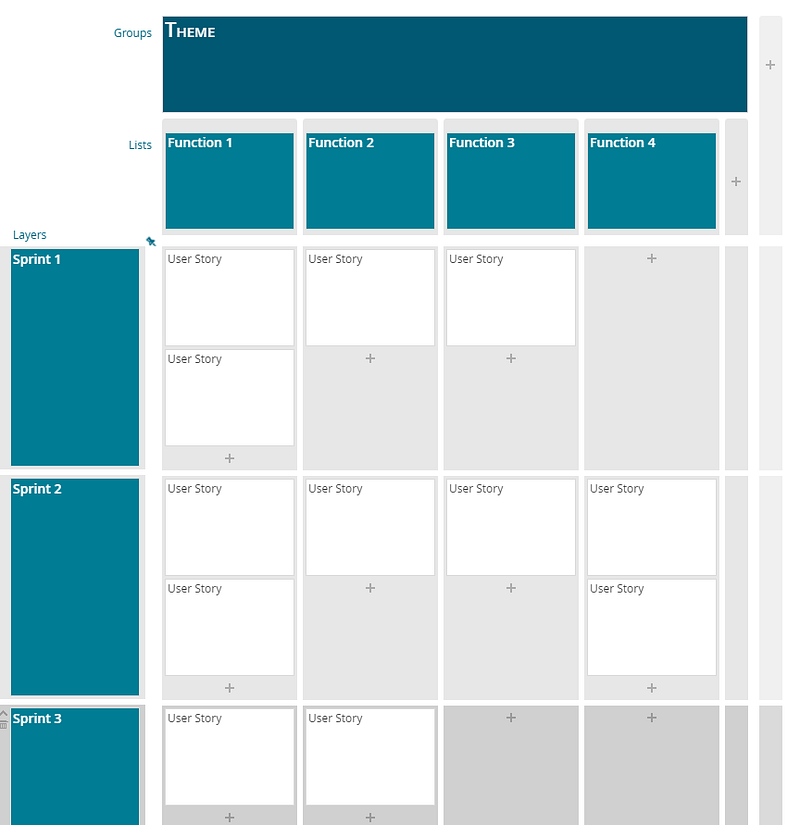
First write out the user stories by setting out functions.

Horizontally, set out the title and set the user story under each function.
Vertically, set out the main stories or issues related to each other.
At this stage you can then prioritise importance from left to right, and from up to down. This creates a format of the top left card, being the most important.
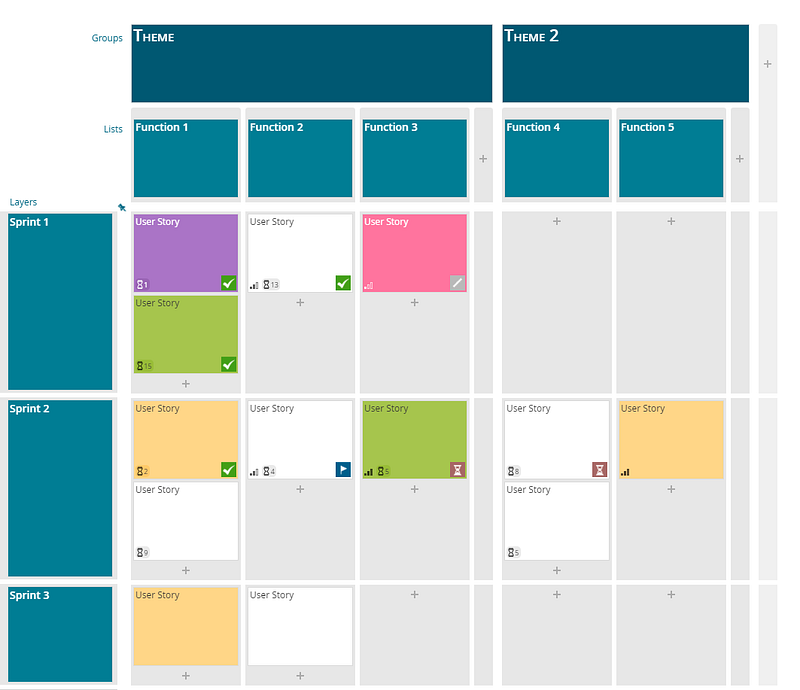
Slicing the list.
Once the stories are organised into groups and themes. You can start with slicing the list into sprints of what is the Minimum Viable Spec, or as Jeff Patton puts it — “The minimum viable product in the smallest product releases that successfully achieves its desired outcomes”.
You can set sprints into what you need to achieve. The trick of utilising story mapping is by setting out the entire dream product, then breaking your product/project into sections of achievable, working, and required sprints.
Next Steps.
Do remember, the story map is not a static beast, it can be adjusted, amended with feedback, changed and adapted to suit the needs of each sprint.
With multiple team members working on it, as a team, you can start to see the end goal. The ideal product starts to form and when working as a group you will be able to clearly define what each task, and part of the project needs.
- Set status of a card
- You can set time estimations
- Set importance of cards
- Use colours to set a custom identifier, such as challenge or complexity.
- Use extra columns and set sections
The use of a story map will grow with each iteration, and with each demand.
One thing is to ensure you are always planning the entire project, clearing backlog and not focusing on individual sprints.
If you want to see the tool we used for the images, check out FeatureMap.co
If you want to dig deeper into User Story Mapping, check out the how-tos Tutorials.